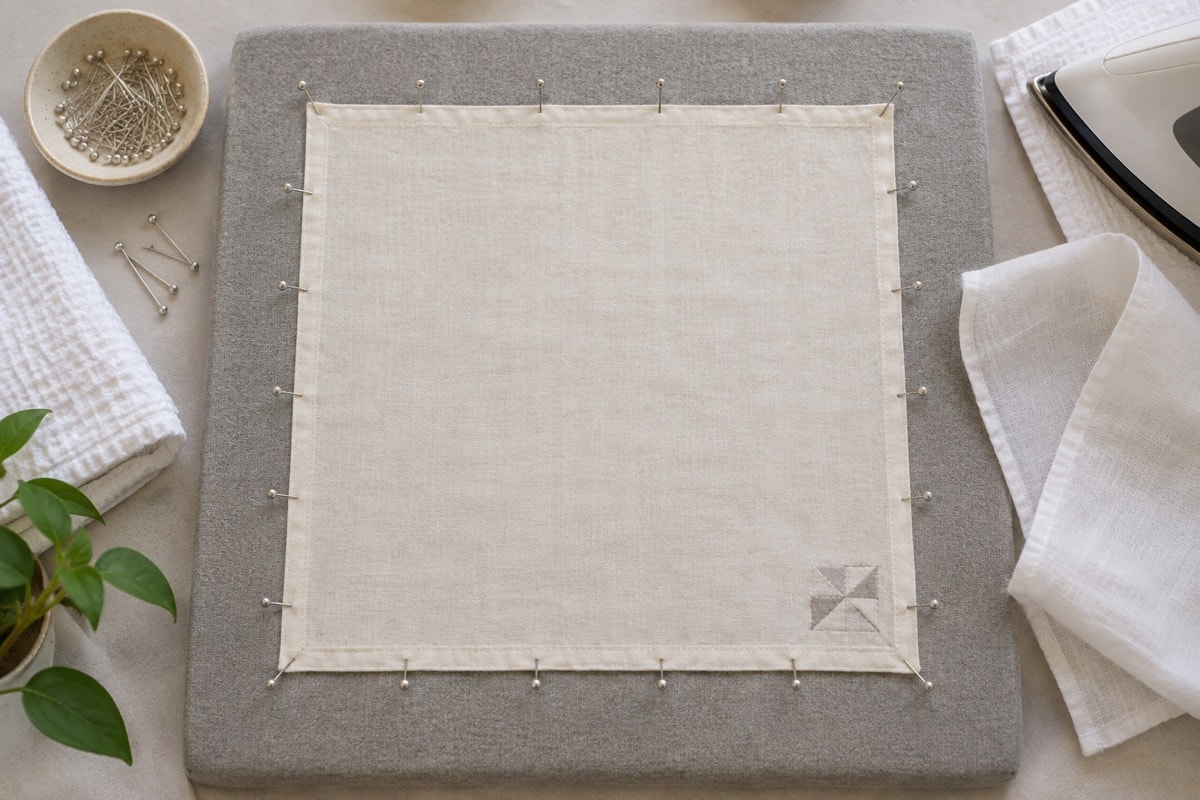
Finishing begins before the first stitch, with clean handling and enough fabric around the design. When the needlework is complete, the aim is to remove only what needs removing, return the weave to square and support the piece without trapping folds or stretching the stitched surface.
Inspect before introducing water
Check the front and back in strong indirect light. Remove loose fibers with clean tweezers, secure every thread tail and look for floss that may not tolerate washing. If the piece includes unfamiliar fiber, dyed fabric, beads, metal or adhesive, do not assume that a general washing method is suitable.
Test a spare piece of every material when possible. Wet it in the same water and with the same mild cleanser being considered for the finished work, then press it between white cloths. Any transferred color is a reason to stop and keep the piece dry.
Wash only when appropriate
For washable cotton floss on washable fabric, place cool water in a clean basin and add a small amount of plain mild cleanser. Lower the piece flat, move it gently through the water and avoid rubbing the stitched surface. Drain the basin and rinse in fresh cool water until no cleanser remains.
Do not twist or wring the fabric. Support its full area with both hands when lifting it. If the needlework is already clean, a full wash may be unnecessary; light dampening during blocking can be enough to relax minor creases.
Remove water without distortion
Lay the piece flat on a clean white towel, roll the towel around it and press along the roll. Repeat with a dry towel if needed. The fabric should be damp rather than dripping before it is squared. Keep the stitched face away from textured or colored surfaces that could leave marks.
Block the weave square
Place the damp piece face up on a clean blocking surface covered with a white cloth. Identify one horizontal and one vertical fabric thread near the design. Adjust the edges until those threads meet at right angles and the design dimensions agree with the planned size.
Pin outside the final display area with clean rust-resistant pins, working from the centers toward the corners and alternating sides. Use enough pins to distribute tension rather than pulling hard at four points. Let the piece dry completely while flat. Remove the pins and confirm that the fabric remains square without them.
Press from the reverse
If pressing is appropriate for the materials, place the work face down on a thick clean white towel. Use moderate heat through a plain pressing cloth and lift the iron rather than sliding it across the back. The towel protects the raised texture of the crosses and knots.
Test the temperature on a spare stitched sample. Avoid pressing over beads, metal or unknown fibers. Let the fabric cool flat before measuring or mounting.
Plan a reversible mount
A laced mount holds the fabric around a clean, suitable board without glue touching the needlework. Center the design, fold opposite margins to the back and lace them with strong thread in a gradual alternating sequence. Repeat for the other pair of sides, checking the front after each few passes.
The lacing should hold the fabric smooth without bowing the board or flattening the stitches. Fold corners neatly at the back and secure them without cutting away generous margins. Reversible methods preserve the option to remove and remount the textile later.
Check alignment before closing the frame
Set the mounted work upright and view it from several feet away. Compare the design center with the opening, check that horizontal rows remain level and look for a shadow from a loose thread. Corrections are easier before the backing is closed.
Keep a small record of the fabric, floss and finishing steps with the piece. For size planning before a future project, see Fabric Count and Finished Size. For tidy ends that make mounting flatter, see Starting and Finishing Threads Neatly.