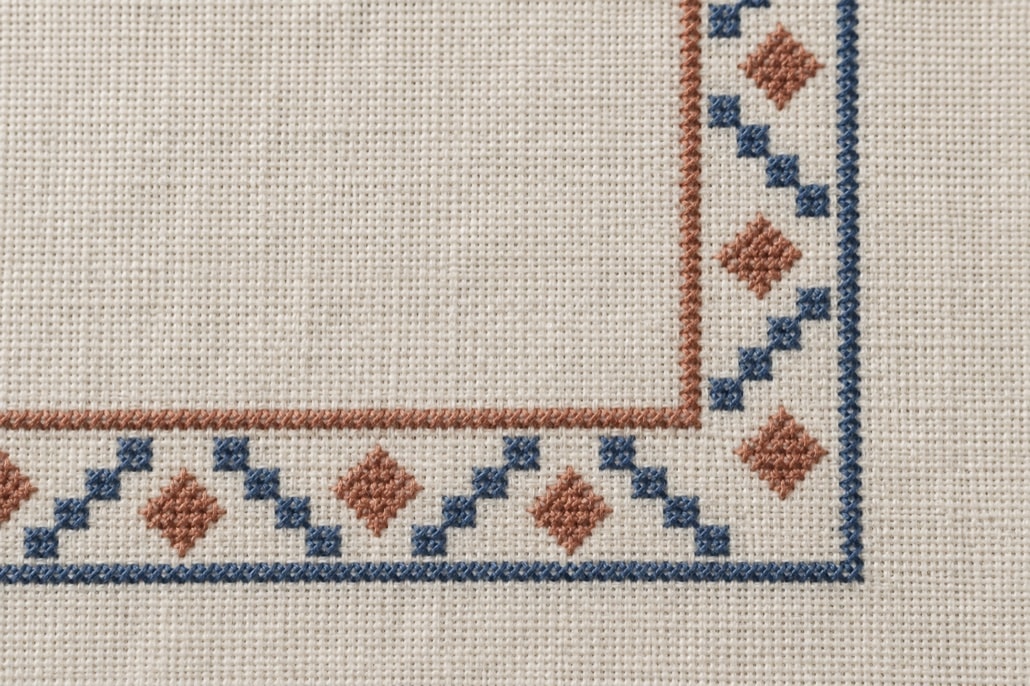
A counted border is a repeating system with four meetings to solve. The straight run may be simple, but the corner exposes whether the unit, spacing and overall dimensions were planned together. Working first on a blank grid makes it possible to adjust the repeat without removing stitches from fabric.
Define the repeat interval
The repeat interval includes the stitched unit and the blank space before the next unit. If a stepped diamond occupies five squares and two blank squares follow it, the interval is seven. Measure from the same point on one unit to the same point on the next. That constant interval is what must fit along each side.
Draw several repeats in a row and mark their centers. Check whether adjacent units feel crowded or disconnected. Changing a gap by one square can alter the rhythm more than adding detail inside the unit.
Choose a corner strategy
A border can turn through a distinct corner unit, mirror its final repeat, rotate the ordinary unit or stop before an open corner. Each choice creates a different visual weight. A separate corner unit is flexible because it can absorb spacing, while a rotated repeat creates strong continuity but demands exact geometry.
Draw all four corners, not just one. Rotation can reverse the apparent slant of a stepped unit, and a mirror may behave differently at the lower edge. The test should show the border as a complete rectangle.
Fit the repeats to a fixed width
Begin with the total width in stitches. Subtract the space reserved for both corners. Divide the remaining run by the repeat interval. If the result is a whole number, the units fit exactly. If a remainder remains, decide whether to enlarge the corner space, change the gap or redesign the unit.
Do not hide a partial repeat at one end. Unequal correction is visible even when the individual error is small. Divide an odd remainder across both sides only if the final left and right spacing still looks intentional.
Use midpoint planning
For a symmetrical border, mark the midpoint of each side and build outward on paper. A central unit can sit directly on the midpoint, or two units can mirror across it. This method keeps the left and right ends balanced and reveals early whether the corner spacing will match.
When transferring to cloth, baste the center lines and outer boundary. Count from both the midpoint and the nearest corner checkpoint before completing a long run.
Invent with basic geometry
Original border units can be built from single crosses, bars, stair steps, chevrons and diamonds. Limit the first experiment to one or two colors and a narrow depth. Complexity should come from rhythm and spacing rather than from reproducing a familiar published ornament.
Try shifting every second unit by one row or alternating filled and open diamonds. Save each trial on its own small grid with the interval written in surrounding notes. The resulting library reflects the maker's own decisions.
Stitch in a countable order
Work one side from its midpoint toward a corner, checking each repeat against the basted boundary. Complete the corner, then begin the adjacent side. Avoid carrying floss around the reverse of an open corner; finish the thread and start again when a long carry would show or tighten the fabric.
Consistent upper diagonals help a rotated border feel unified. Review the full-cross method and neat thread endings before beginning a wide frame.
Evaluate the full rectangle
Release the fabric from its hoop or frame and place it flat. Check that opposite sides contain the same number of units, corresponding corners match and the open ground is even. A border is successful when the eye travels around it without catching on an accidental interruption.